
Creating your own video recording and sharing it via a link
This guide is intended for students and pupils to create a short video (e.g., a presentation or a short talk) using the school Microsoft 365 account and share it with others via a link for viewing. If needed, you can also add subtitles.
What will we do?
- Sign in with the school account.
- Record a video with the webcam directly in the browser.
- Trim the beginning and end of the video (if needed).
- Add automatic subtitles (if needed).
- Share the video as a link.
Step 1: Open Clipchamp
Because you are using a school account, Clipchamp is part of your Microsoft 365 package and saves your work securely to OneDrive. You don’t need a separate program—everything happens in the web browser.
- Go to https://clipchamp.com/ and sign in with your SCHOOL username and password.
- Second option: find the app via https://www.office.com. Open the apps menu and select Clipchamp. (Tip: If you don’t see it right away, click “All apps”.)
- Third option: open it via this link: https://emkts-my.sharepoint.com/_layouts/15/videohub.aspx
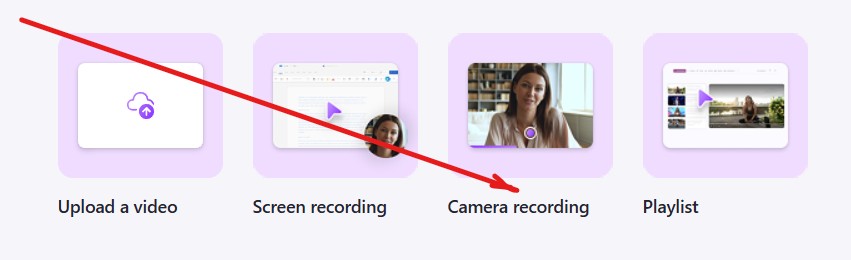
- To start a new project, click “Camera recording”.
Step 2: Record yourself with the camera
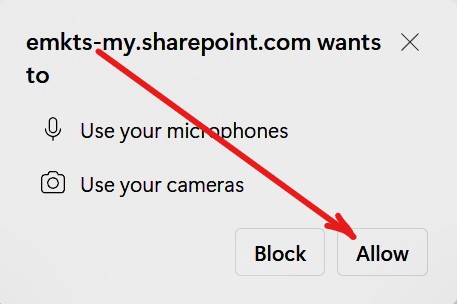
1. Your browser will ask for permission to use the camera and microphone—make sure you click Allow.
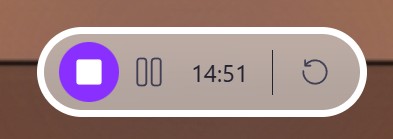
2. In the center of the camera view, click the red button “Start recording”.
3. When you are finished speaking, click Stop (Stop and review).
4. Preview the clip. If needed, you can delete it and start again.
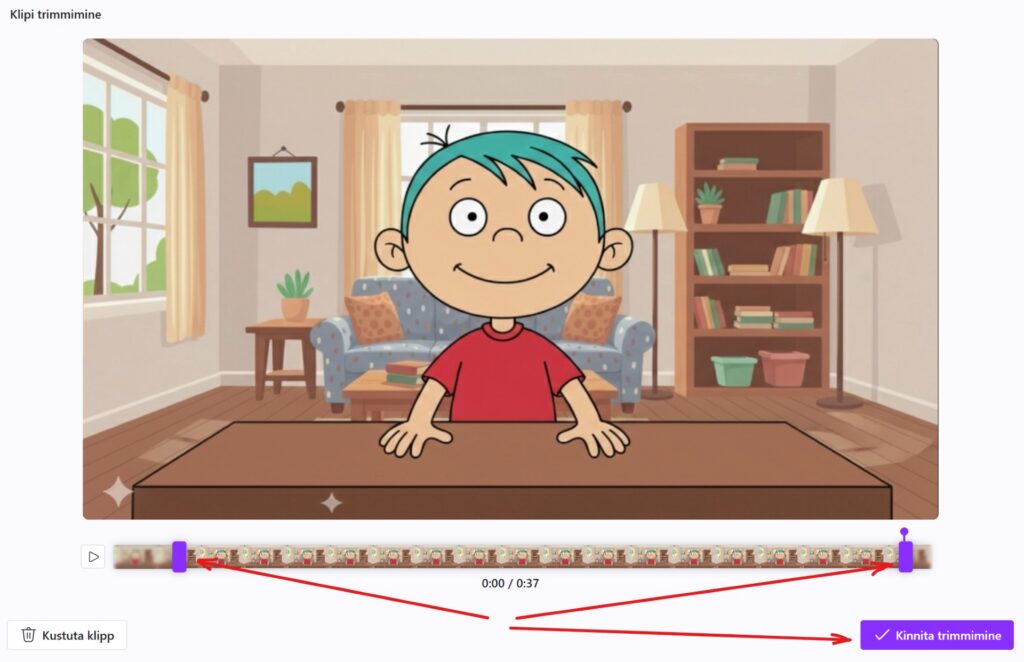
5. You can trim the video from the beginning and end. Use the Trim button.

6. Find the beginning and end you want to cut and drag the trim handles on the timeline. When you’re done, click Confirm trim.
7. When the clip is ready to share, click Done in the bottom right.
The video will open in My-SharePoint / OneDrive, where you can add subtitles, trim further, and make it available to others via a link.
Step 3: Add and download subtitles
Subtitles make the video easier to follow and can also be used as support material for translation.
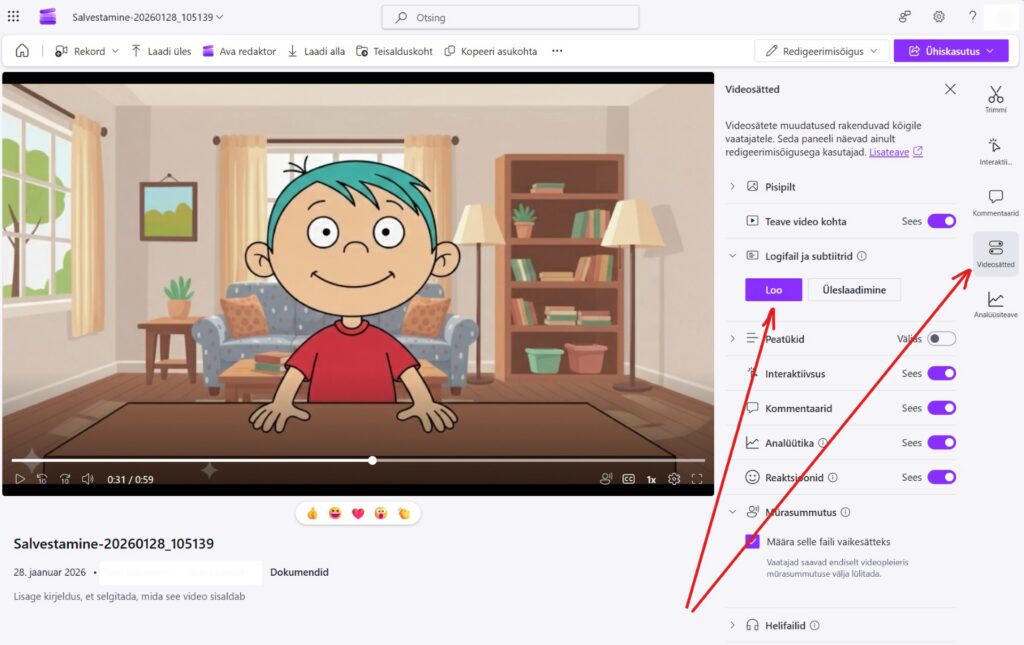
In the opened video view (My-SharePoint / OneDrive page), you can add subtitles as follows:
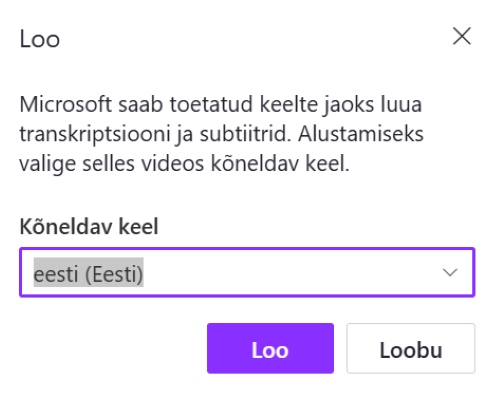
1. Select the language you speak in the video (e.g., Estonian) and confirm. The system will generate the text automatically.
2. In the panel on the right, you can read the text and correct errors if needed.
It’s possible that SharePoint / Clipchamp has already detected the language and creates subtitles automatically. Review them, and if they were not created correctly, generate them using the method described here.
Do you need to translate the subtitles?
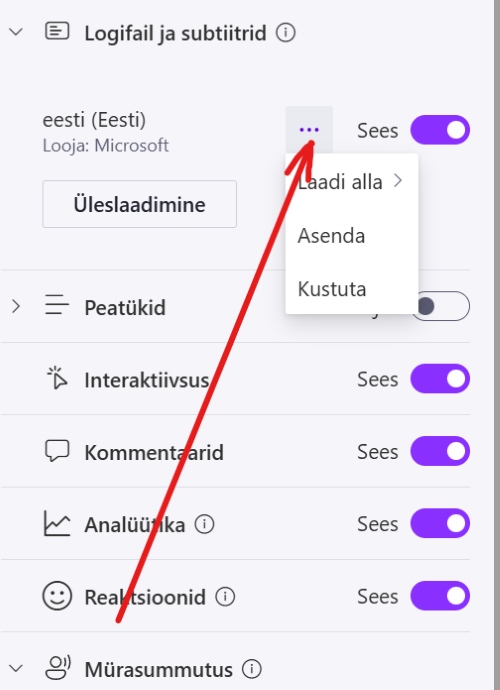
If you want to translate the subtitles (e.g., into Russian or English), click the three-dot menu in the subtitles section, select “Download” (Download captions), and choose a VTT file. This saves the subtitle .vtt file to your computer.
You can translate it, for example, using Microsoft Word or another method. Here we will look at translating with Microsoft Word. We assume you have it installed on your computer (we assume all students can access it through the school).
1. Open the VTT file with Notepad: right-click the file → Open with → Notepad
2. Copy the entire text
3. Open Word and create a blank document. Paste the copied text into Word.
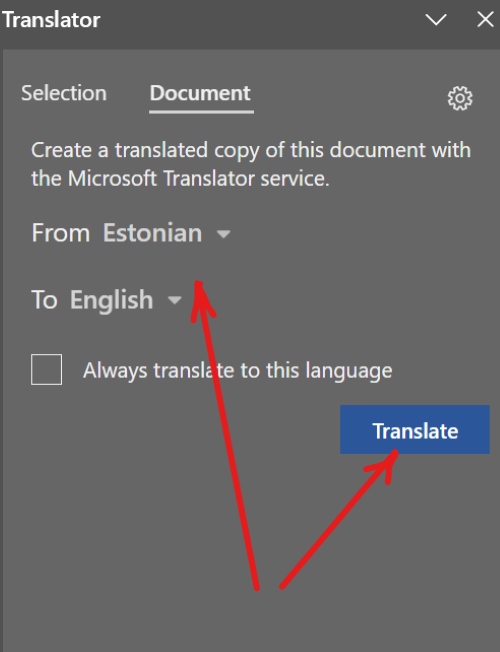
4. Start the translation using the menu: Review → Translate → Translate → Translate document.
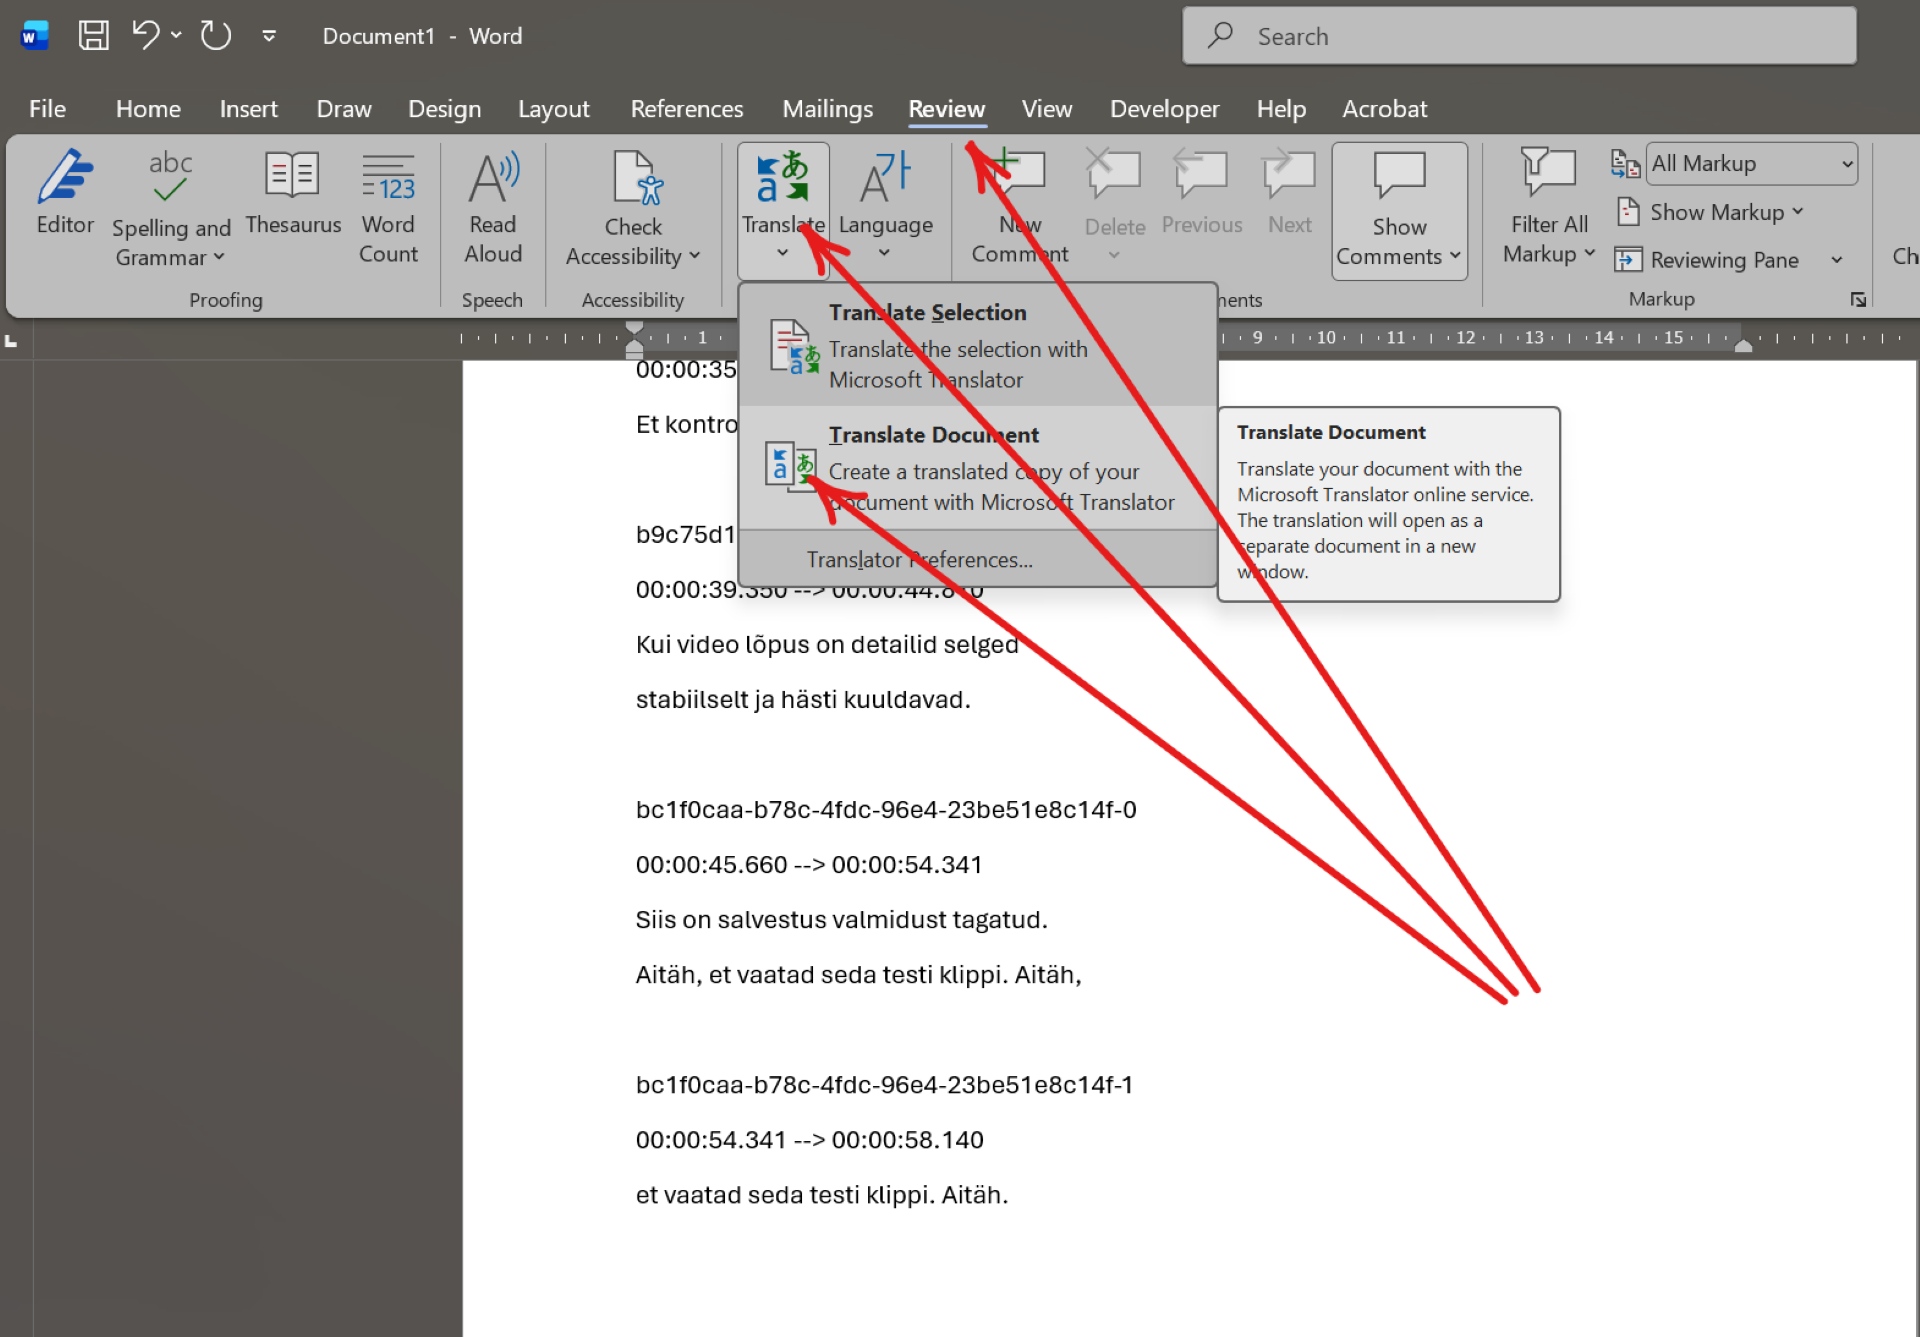
5. Choose the translation languages and start the translation, for example: From Estonian to English → Translate
6. Copy the translated text and paste it into a blank Notepad file.
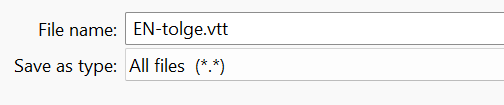
7. Save the translation. The file extension must be .vtt, for example EN-translation.vtt. To do this, choose Save as type “All files” and save.
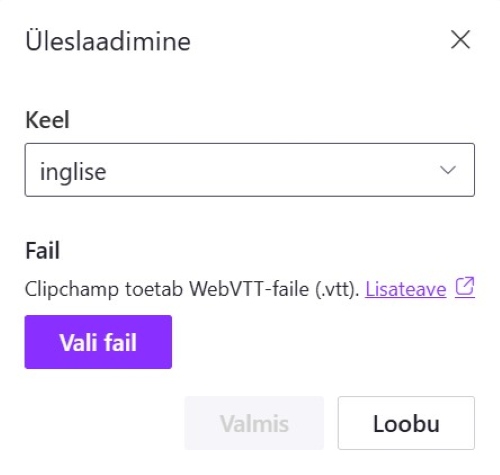
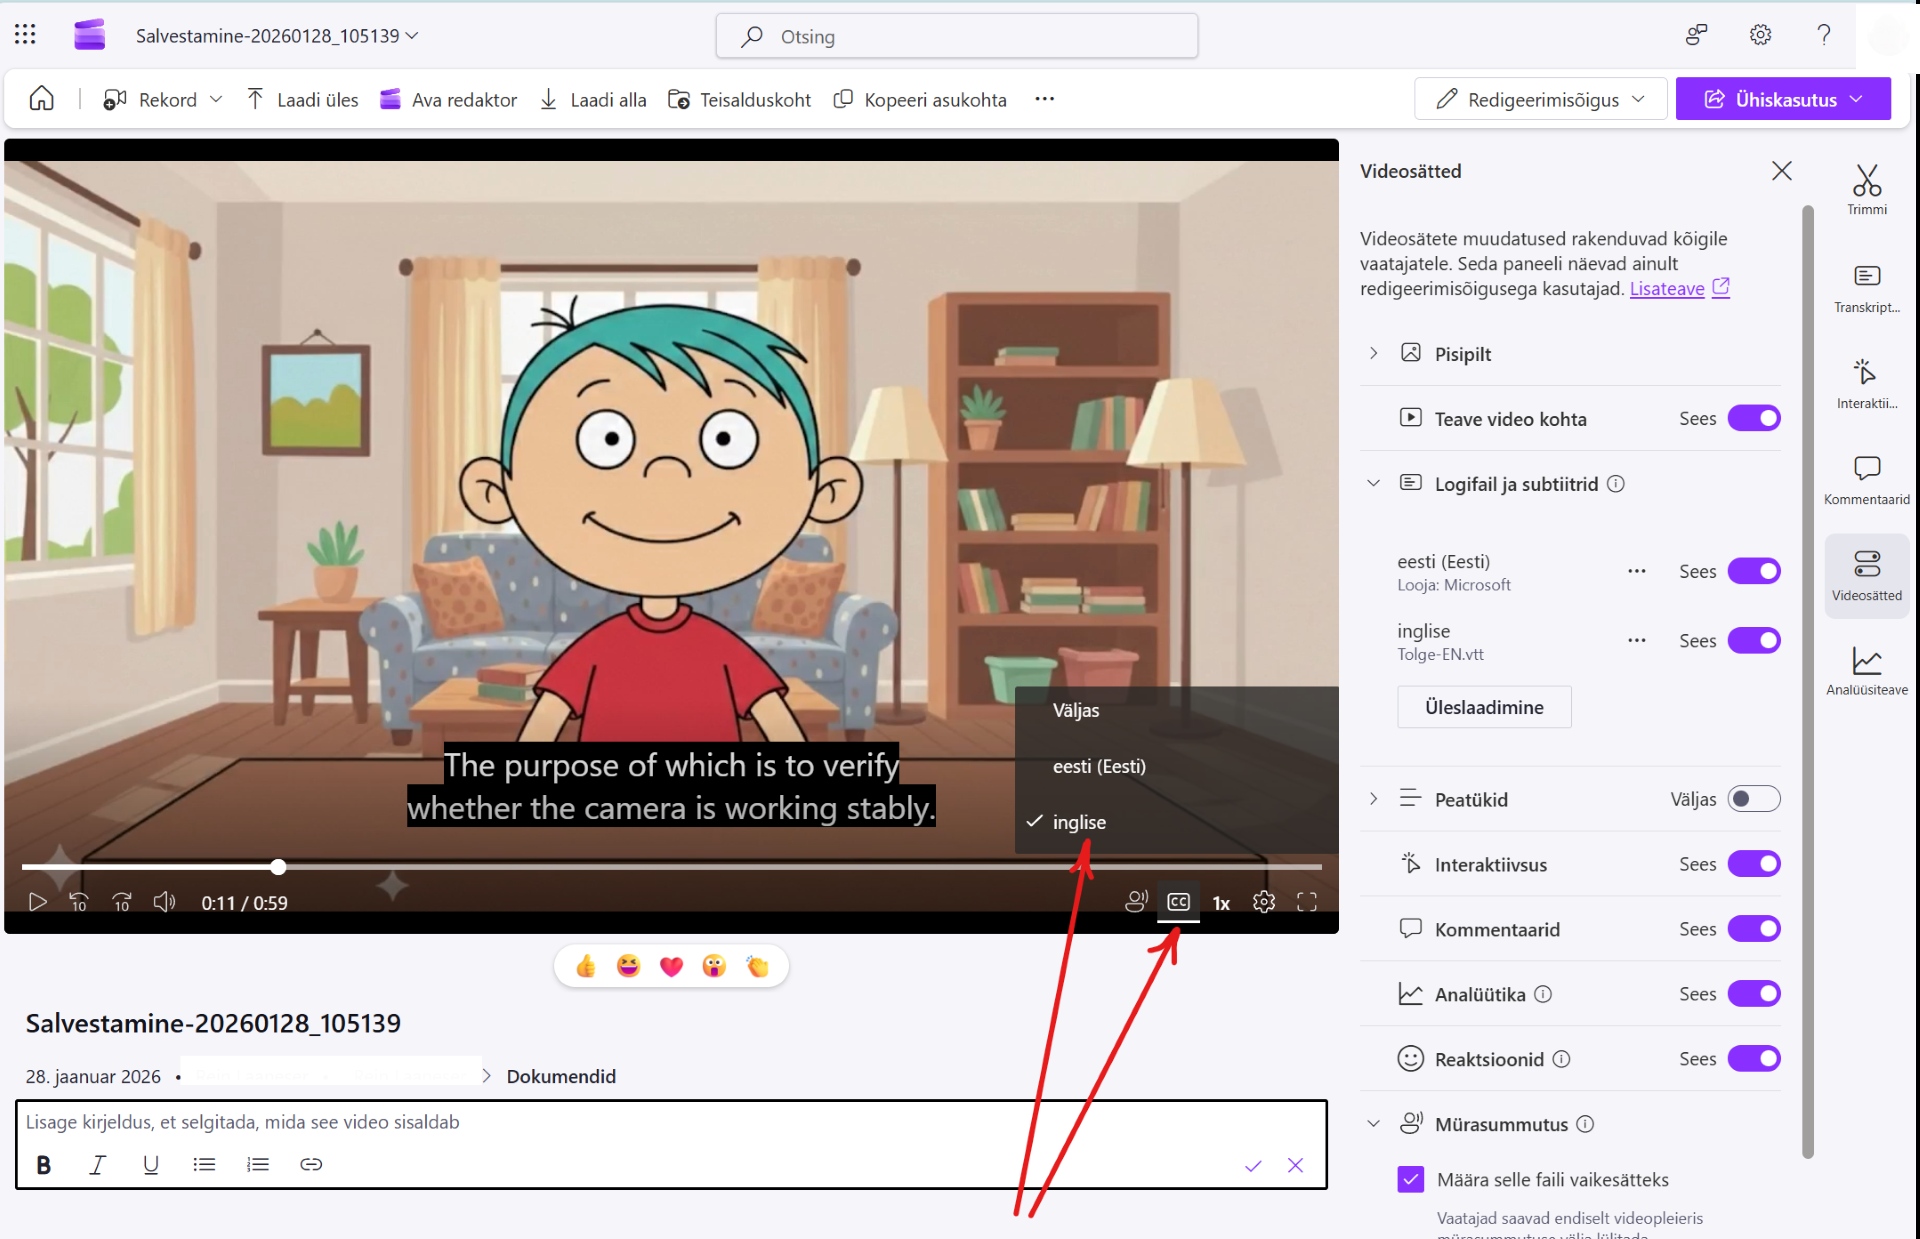
8. Add the translation as a new subtitle track in the video settings under “Transcripts and captions” → “Upload”.
Set the subtitle “Language”, add the subtitle “File”, and confirm the upload with the “Done” button.

9. While watching the video, check that the desired subtitles are working.
Step 4: Share the video link
You can download the video file, but in this case we will share it via a link. This way there are no file size limits when sending or uploading. We assume this is for a guest lecturer who does not have a Microsoft account.
To create a public viewing link, follow these steps:
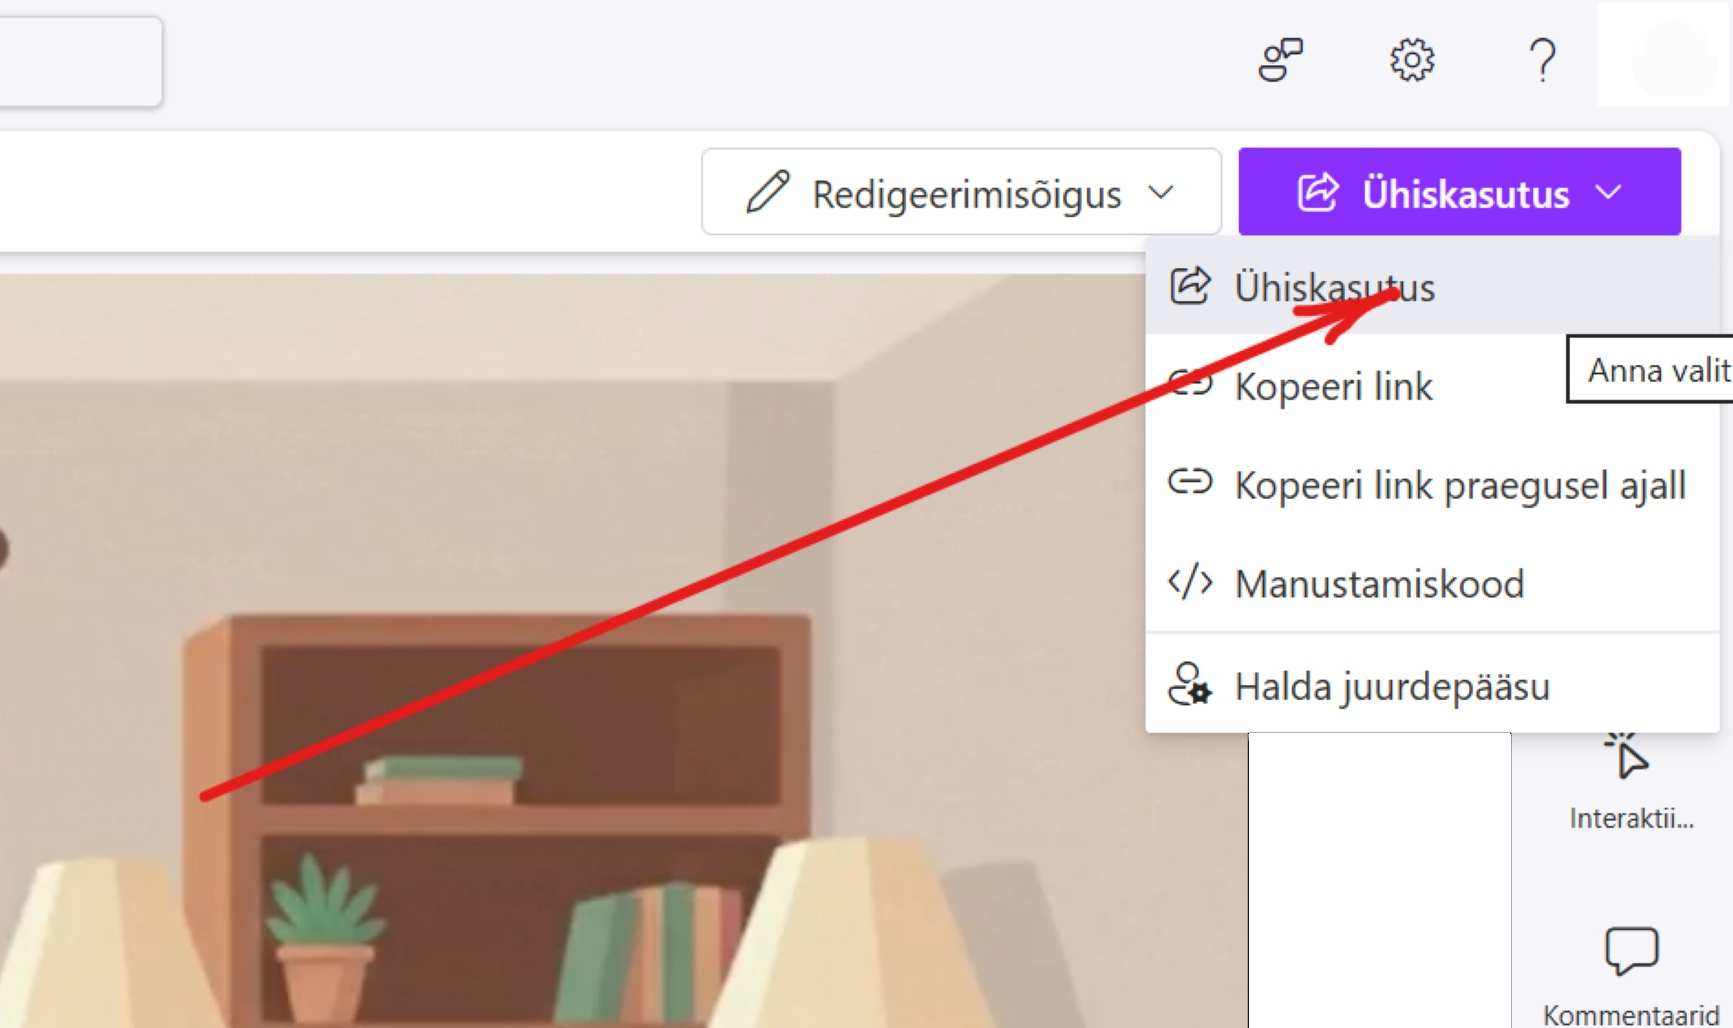
1. Click the share button in the top right.
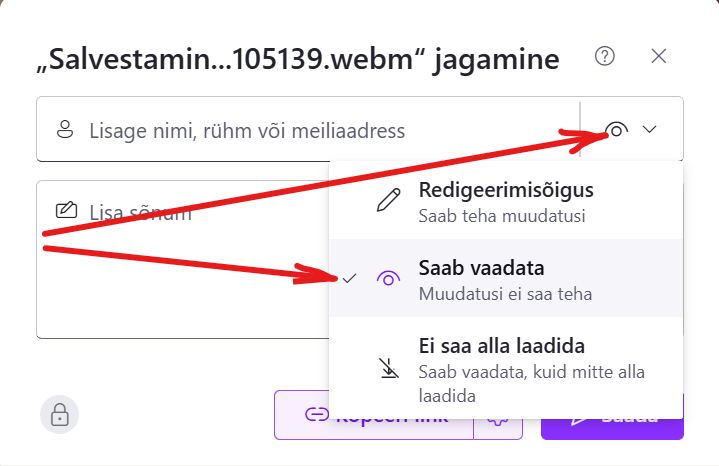
2. Make sure the link permission is set to view, not edit.
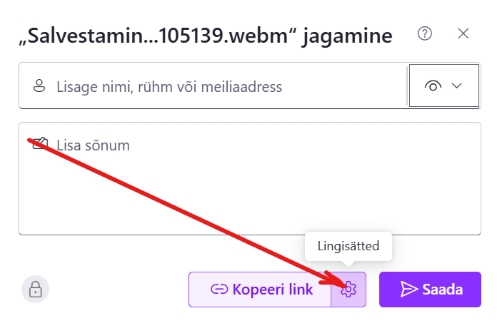
3. To create a link that works for everyone (including guests), click the gear icon “Link settings”.
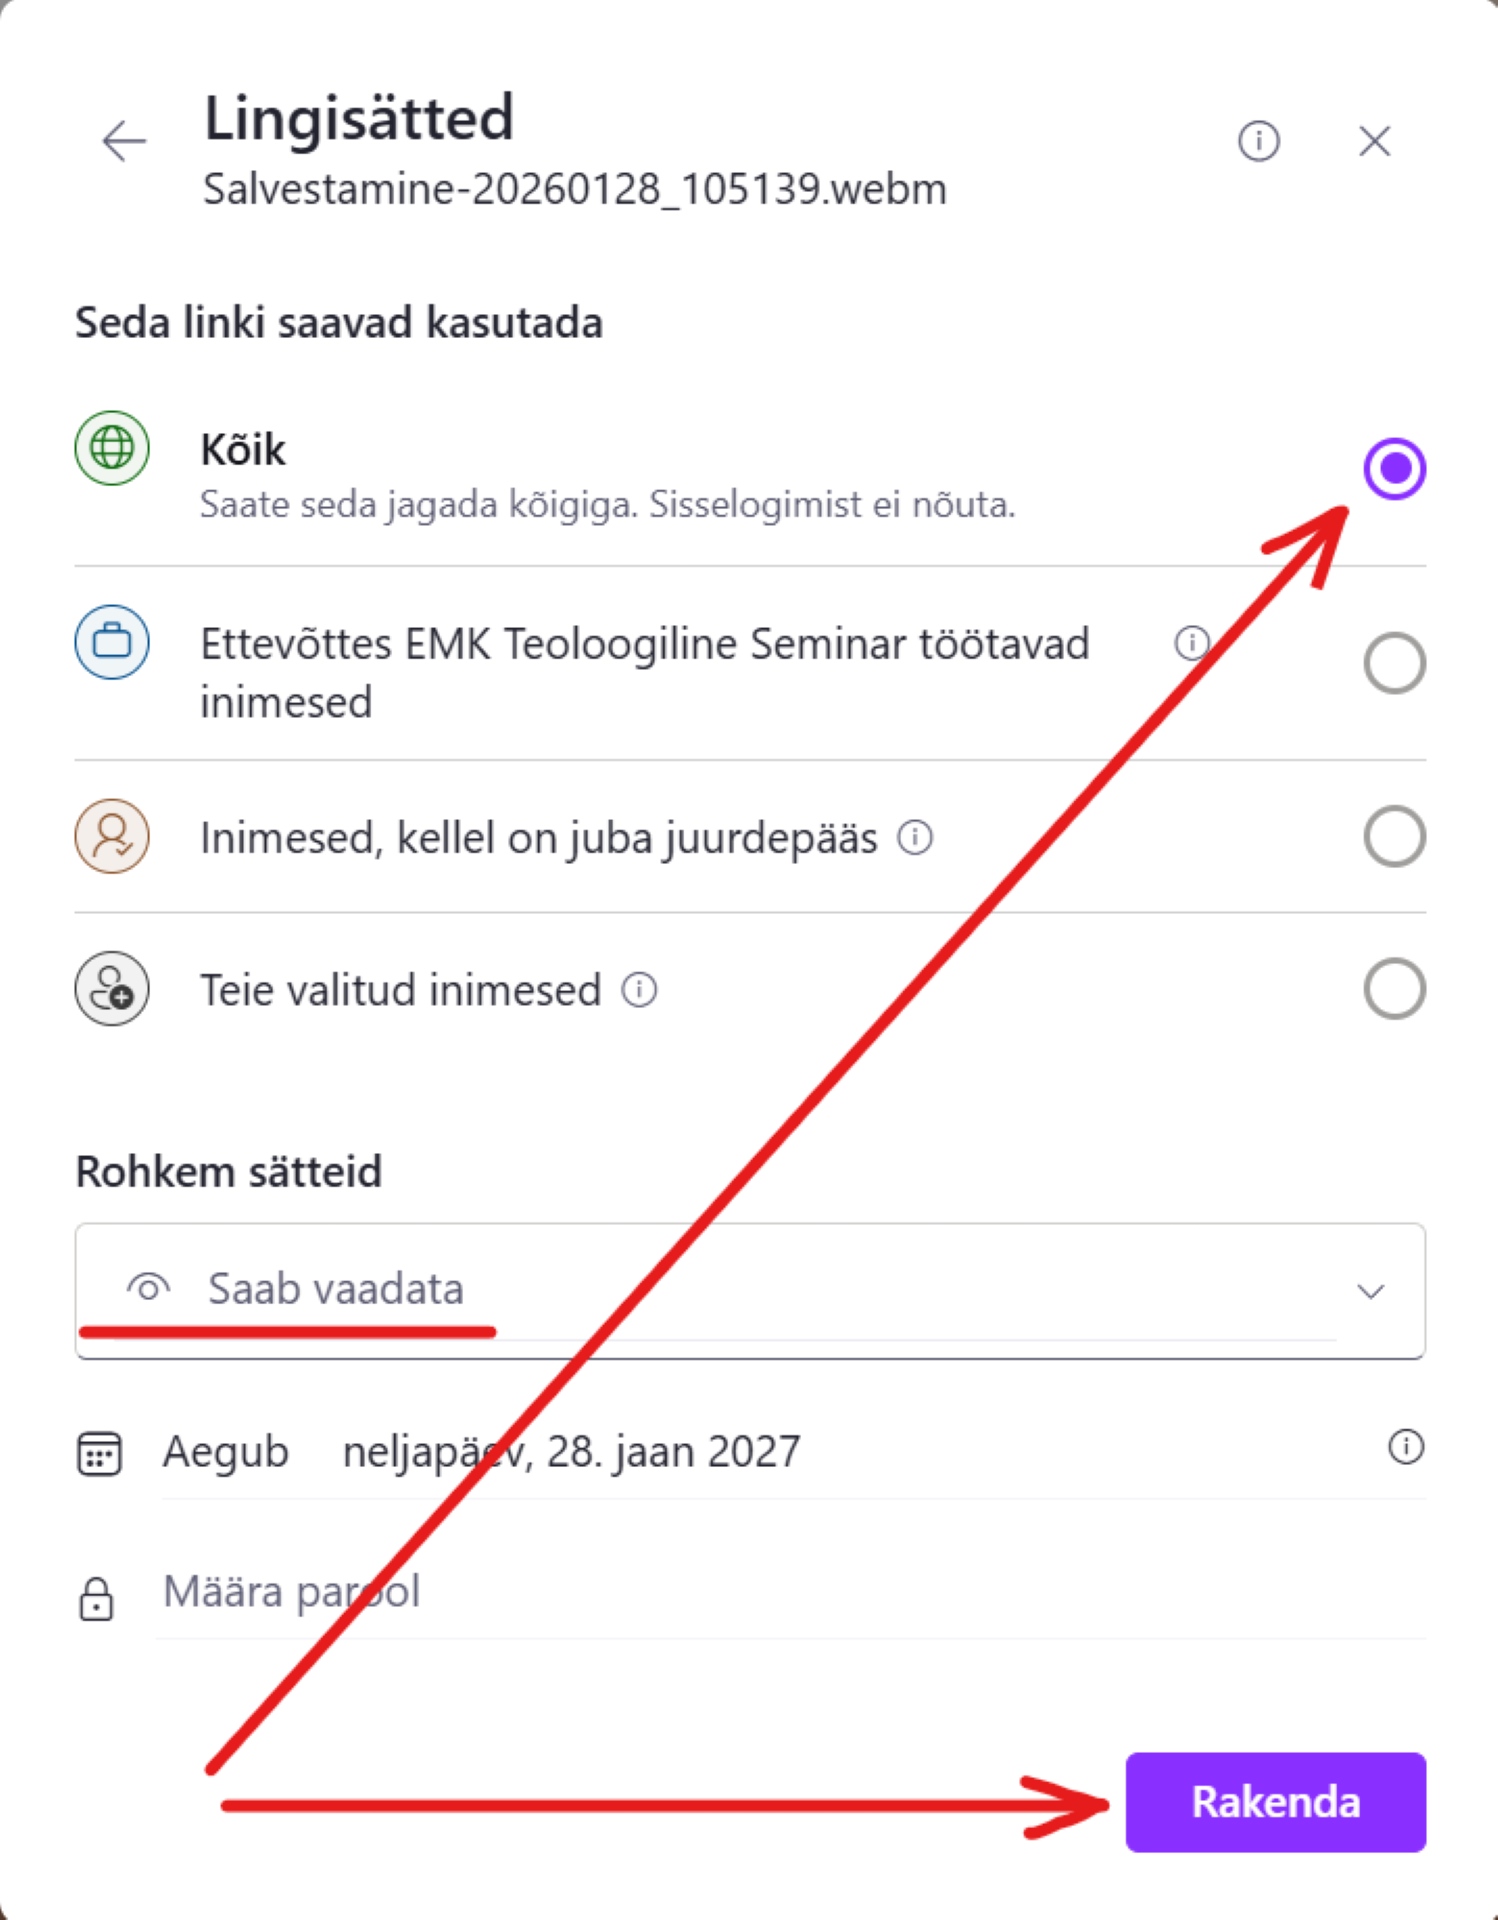
4. Under “This link works for”, select “Anyone” (assuming you are giving access to a guest lecturer or guest student). Confirm with “Apply”.
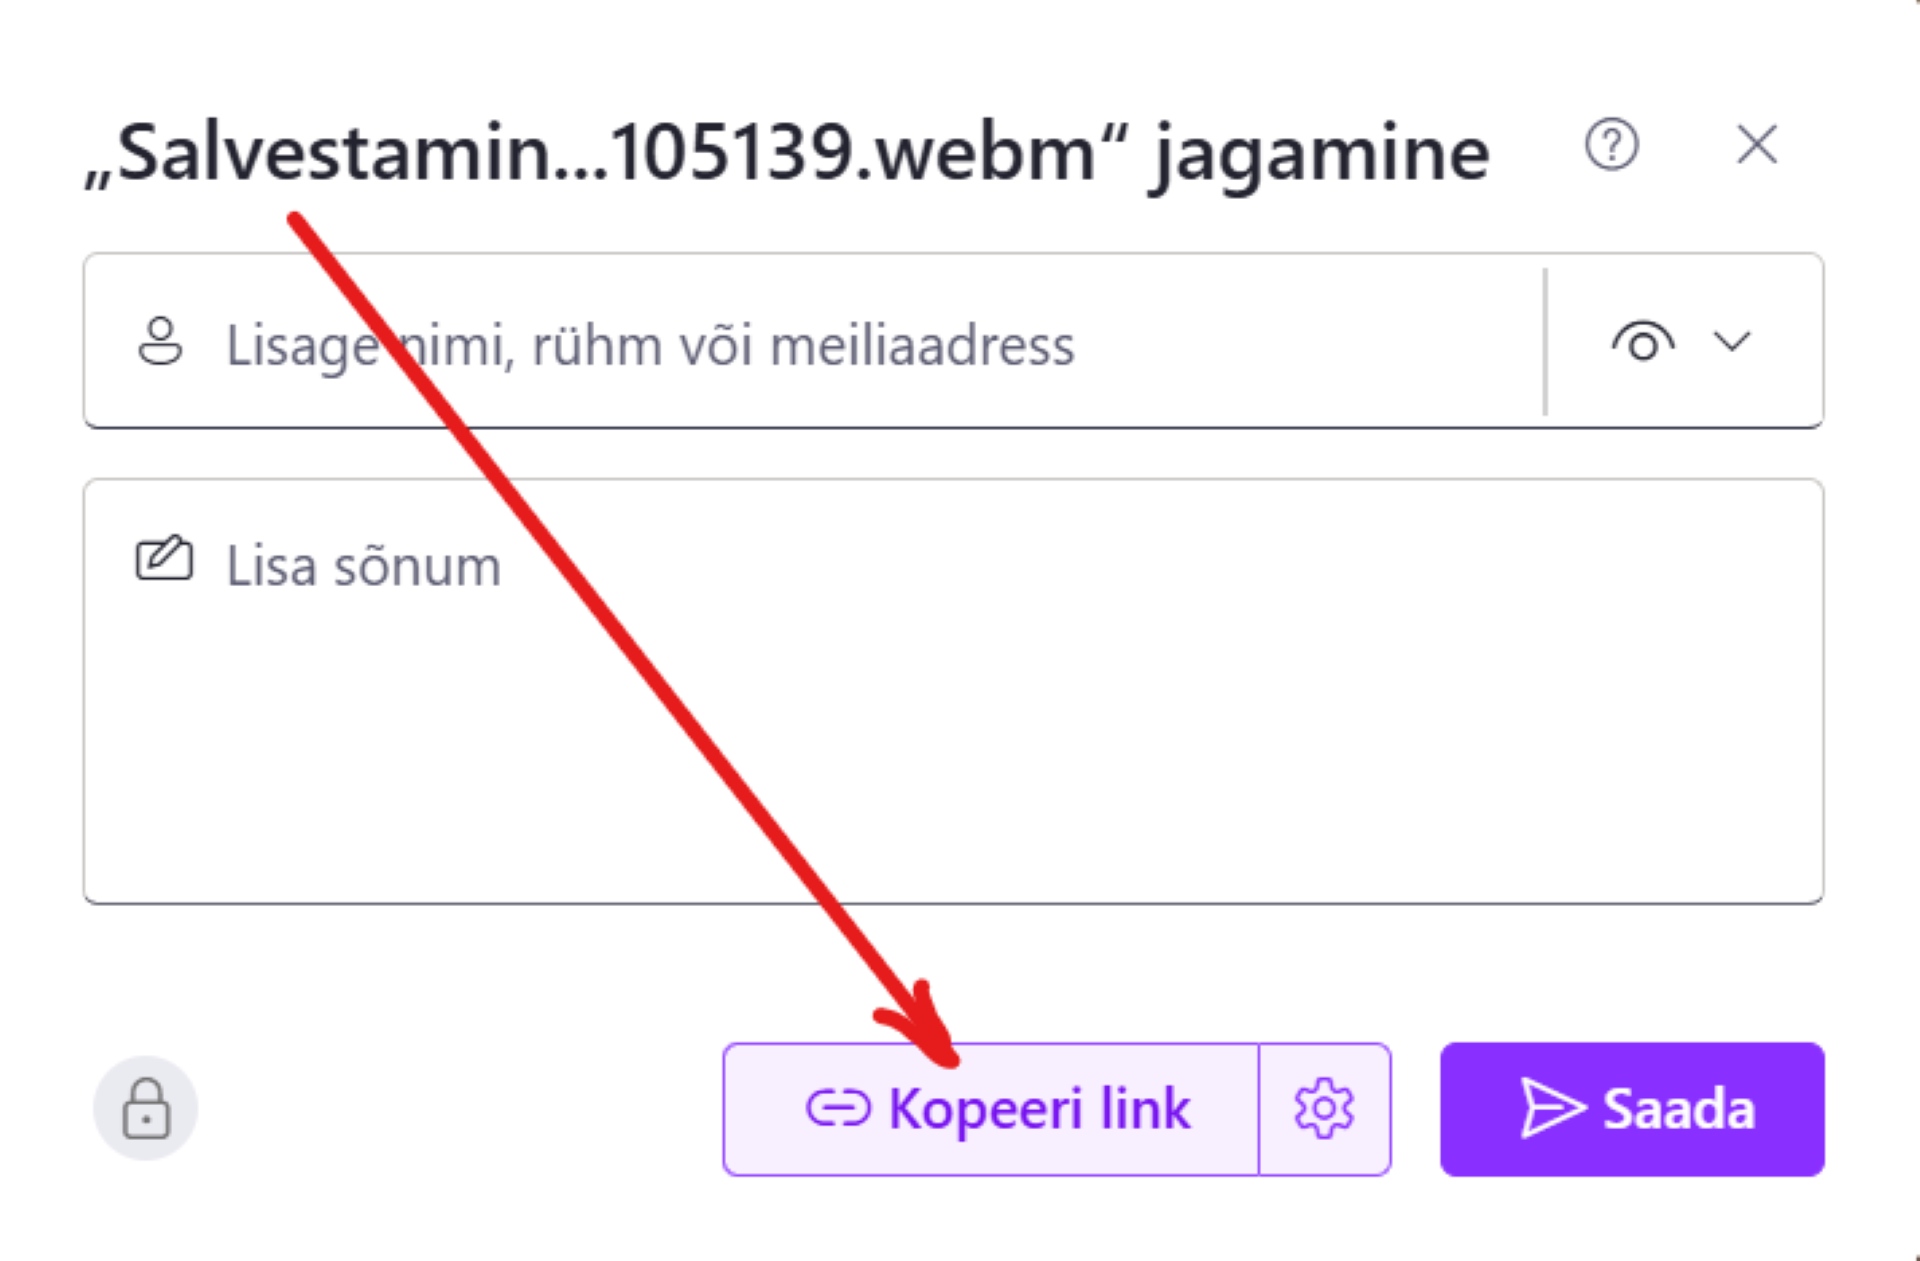
5. Copy the link. After applying the settings, the link is configured, but you still need to copy it.
Click “Copy link”.
Step 6: Posting the link
Now you can paste the copied link into a Moodle assignment, a forum post, or an email, so that it is accessible to the lecturer or a fellow student.
For example, in a Moodle forum:
- Go to the Moodle course (to the forum or the assignment submission box).
- Write your text and paste the copied video link into the text.
- Click “Post” or “Save”.
Your video has now been submitted! The lecturer clicks the link and can watch the video directly in the browser.
Important! Do not delete the video file from your OneDrive folder until the course has ended and grades are published. If you delete the file from OneDrive, the link in Moodle will stop working.